# Using the Editor
We recommend you use the code editor that's included with Shepherd to program your robot. You can either program in Python or use Blockly, a powerful Scratch-like programming tool.
Assuming you've connected to your robot, head to http://robot.go/editor or click the orange editor button on the Shepherd homepage.
# The Editor Interface
You should now see the editor interface. (yours will look slightly different to this)
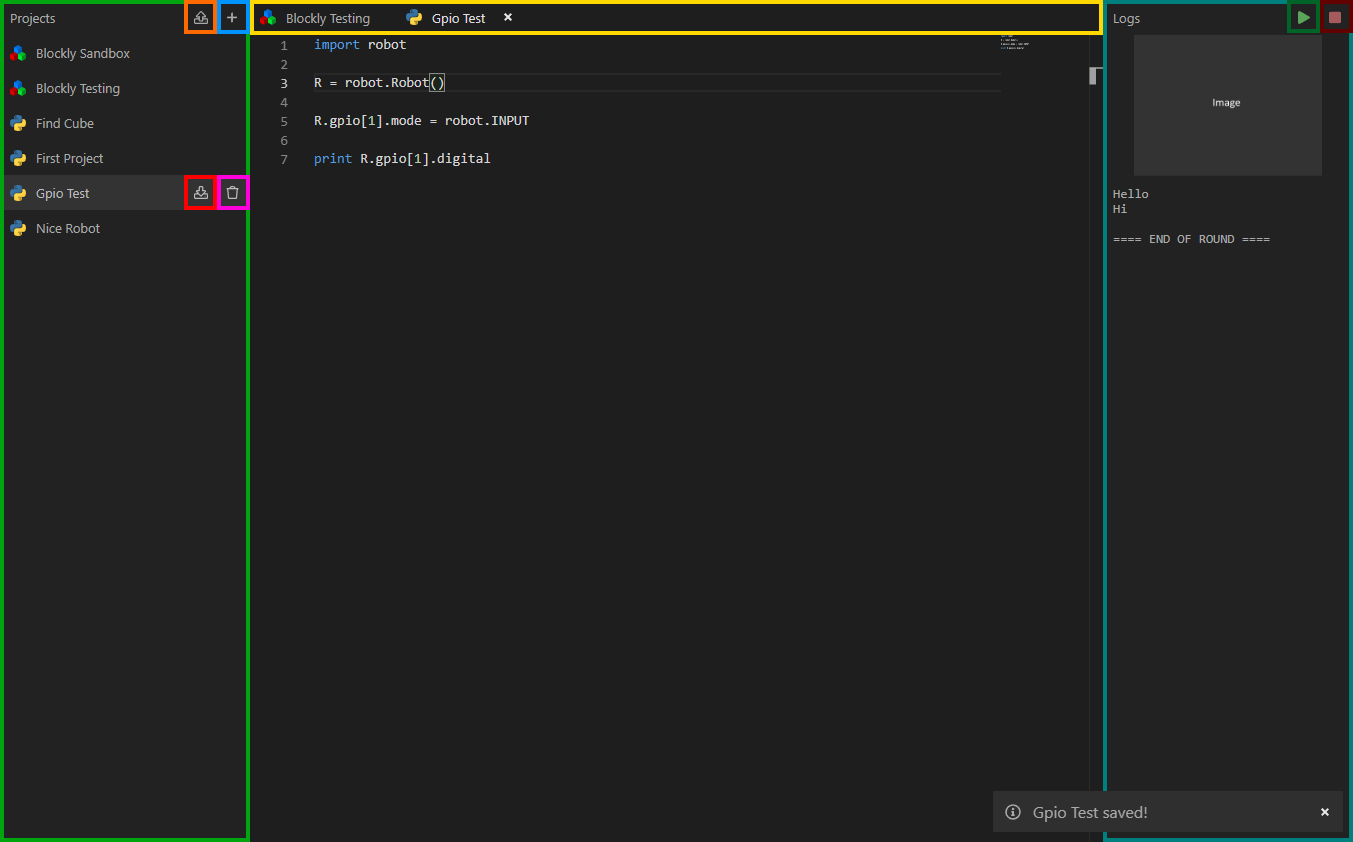
The green sidebar is the projects panel. This is where you can access or export your existing projects, and create or import new ones. Clicking on a project in this list will open it in the editor.
- The orange button is the import button. This lets you load a saved project into the editor.
- The blue button is the create project button. This is how you create a project.
- The red button is the export button. This allows you to save the project to your computer as a backup.
- The pink button is the delete project button. This will allow you to delete a project if you don't want it. There is no way to undo this action.
The yellow toolbar is the tab list. This is where you can find all your open projects. If your project has a white circle at the end of the tab, it means you have unsaved content. Projects are auto-saved after you stop editing them or when you run your project, but you can also manually save by pressing the CTRL and S keys simultaneously.
The teal sidebar is the logs panel. This is where you can see the output from your robot when you run your program.
- The dark green button is the run button. Pressing this will prompt you to save your project to your computer, just as a backup, and then run your code on the robot.
- The dark red button is the stop button. Pressing this will force the robot to stop what it's doing, useful if your robot is out of control.
The main section in the middle is the editor. This will be different depending on whether you're editing a Python or a Blockly project.
# Creating a new project
Click on the create project button (marked in blue in the above screenshot). The create project dialog will appear:
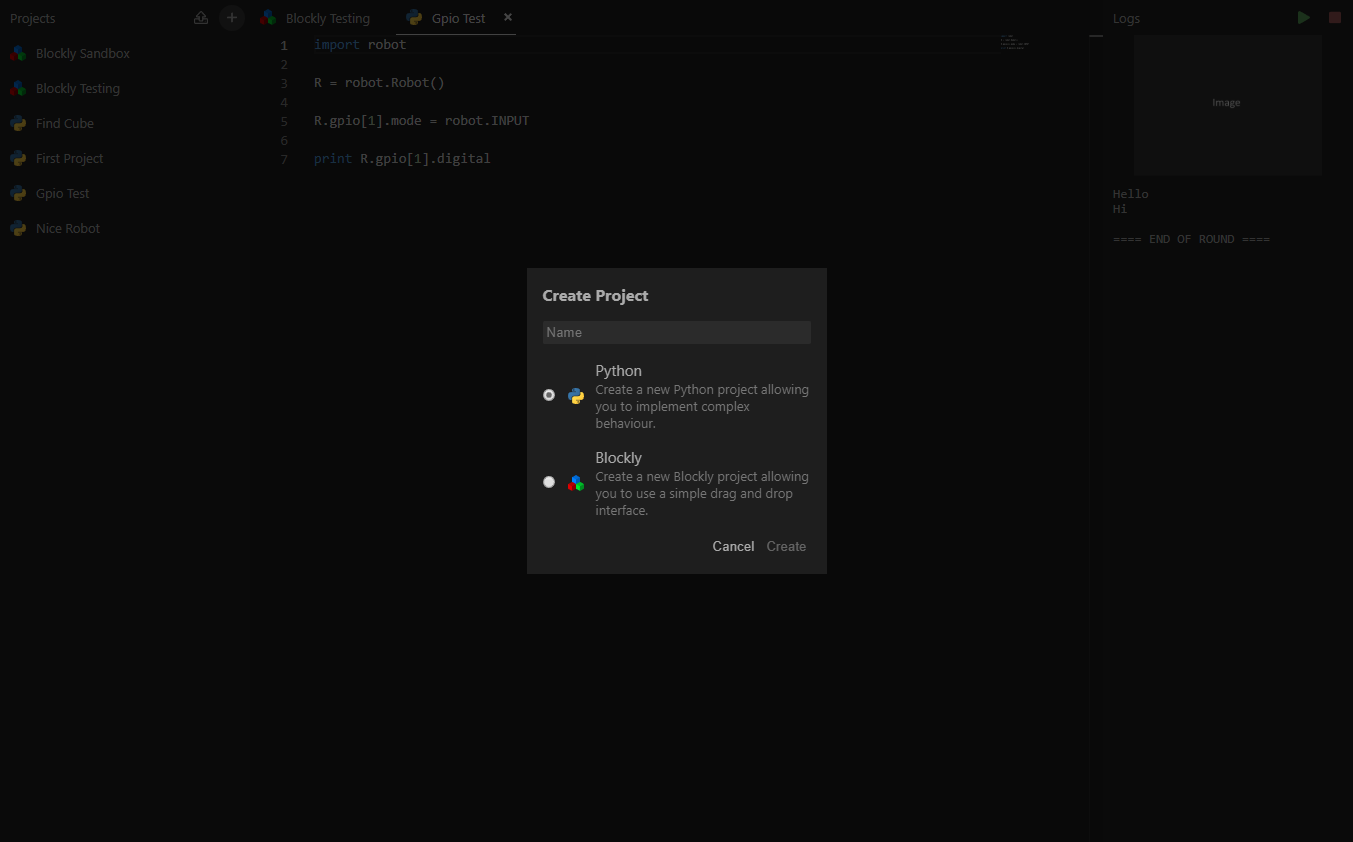
Give your project a name, then select the type of project you would like. Choose either Python or Blockly. Then click the create button.
Your new project will open in the editor. See the sections below for more information on Python and Blockly projects. Once you've read these, why not start learning how to program your robot.
# Python Projects
Python projects provide a powerful development tool with syntax highlighting and code completion for the standard Python libraries and also the robot module. If you are interested, it uses the text editor that powers Visual Studio Code.
# Blockly Projects
Google's Blockly is a programming environment similar to Scratch that allows you to program your robot with blocks. You still have access to all the features of the robot so you are not disadvantaged if you decide to use this over Python.